PayPal business set up
Set Up Your Business PayPal & Connect to Magento Website. Step: Sign Up for a Business PayPal Account. To begin accepting payments on your website, you’ll need to create a PayPal Business account. Go…

Set Up Your Business PayPal & Connect to Magento Website
Step: Sign Up for a Business PayPal Account
To begin accepting payments on your website, you’ll need to create a PayPal Business account.
- Go to Open a Business Account Online | PayPal US
- Click the Sign Up button (top right corner)
- Select Business Account when prompted
- Enter your email address and create a password
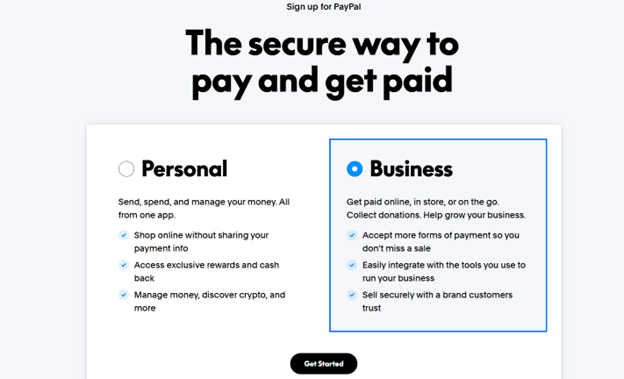
Create your business account
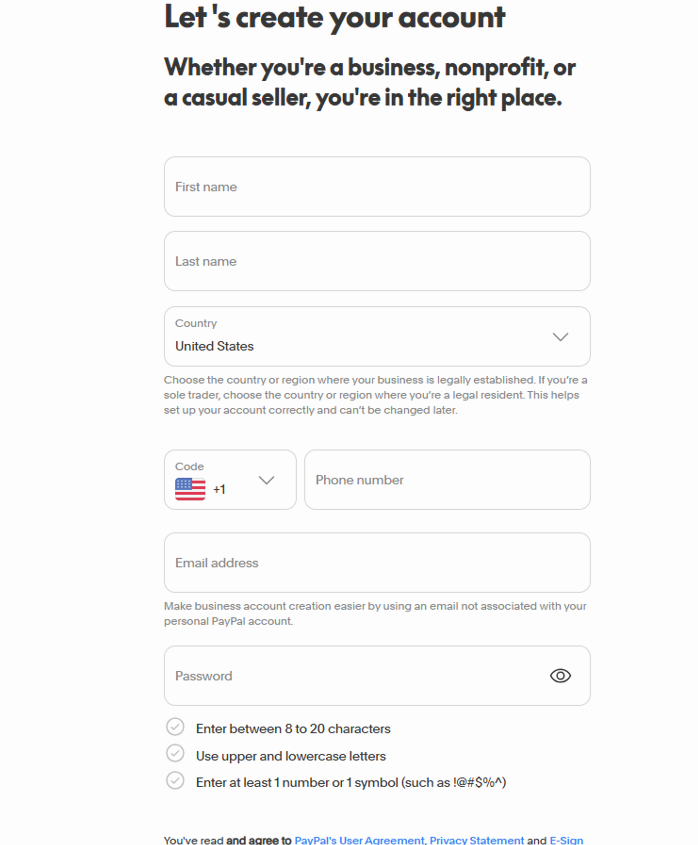
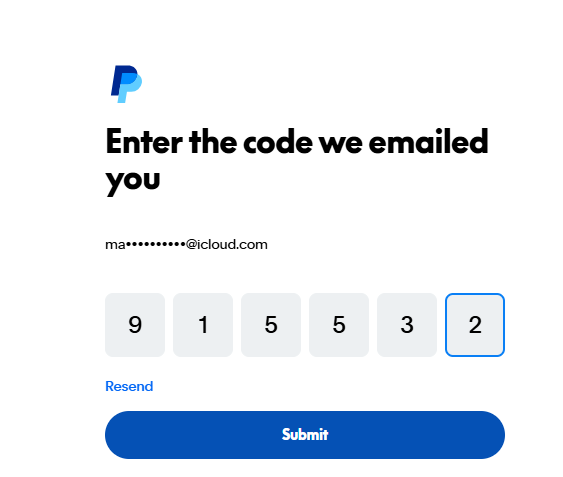
Step: Verify Your Email Address
PayPal will send a verification code to the email address you used during sign-up.
- Check your email inbox for the code from PayPal
- Enter the 6-digit code exactly as shown
- Click Submit
👉 If you don’t see the email, check your spam or junk folder, or click “Resend” to receive a new code.
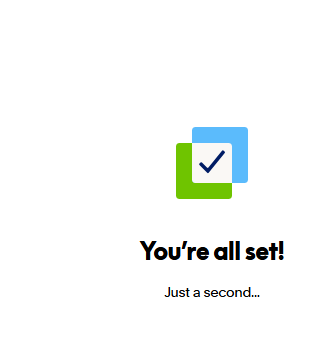
Once completed, you’ll see a confirmation message that your account setup is successful.
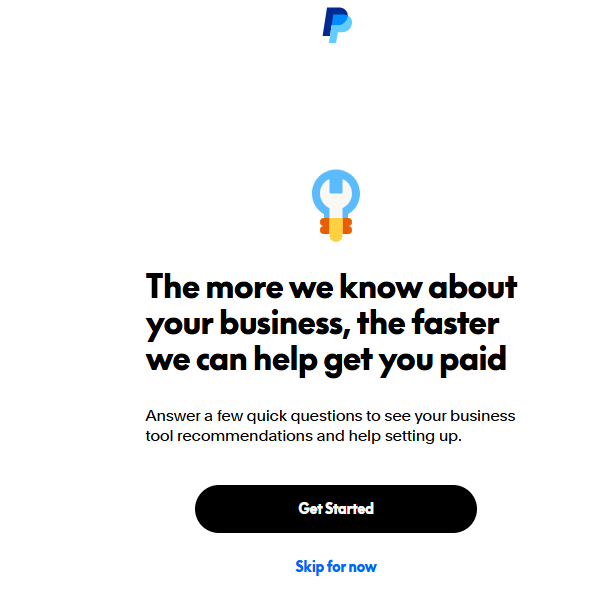
Step: Continue Account Setup
After verifying your email, PayPal will guide you through a quick setup process.
- Click Get Started
- Follow the prompts to answer a few basic questions about your business
- This helps PayPal tailor your account for accepting payments
👉 If needed, you can click “Skip for now,” but it’s recommended to complete this step to ensure your account is fully set up for payments.
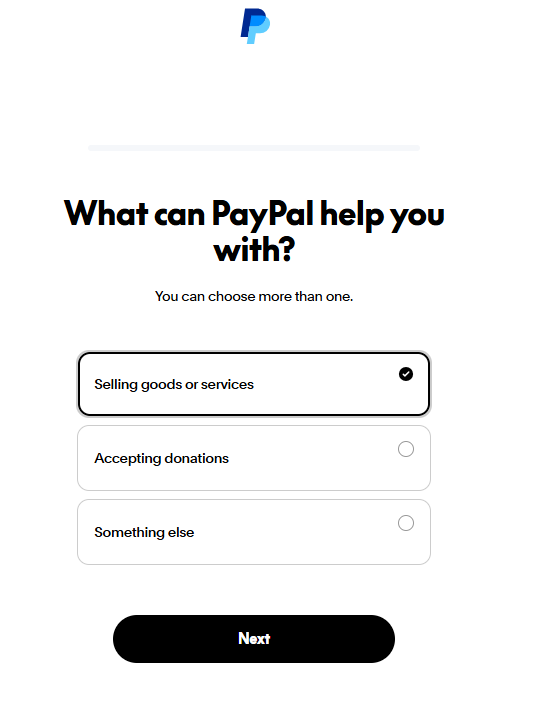
Step: Select How You’ll Use PayPal
PayPal will ask how you plan to use your account.
- Select Selling goods or services
- Click Next
👉 This option is required for your Magento website so you can accept payments from customers.
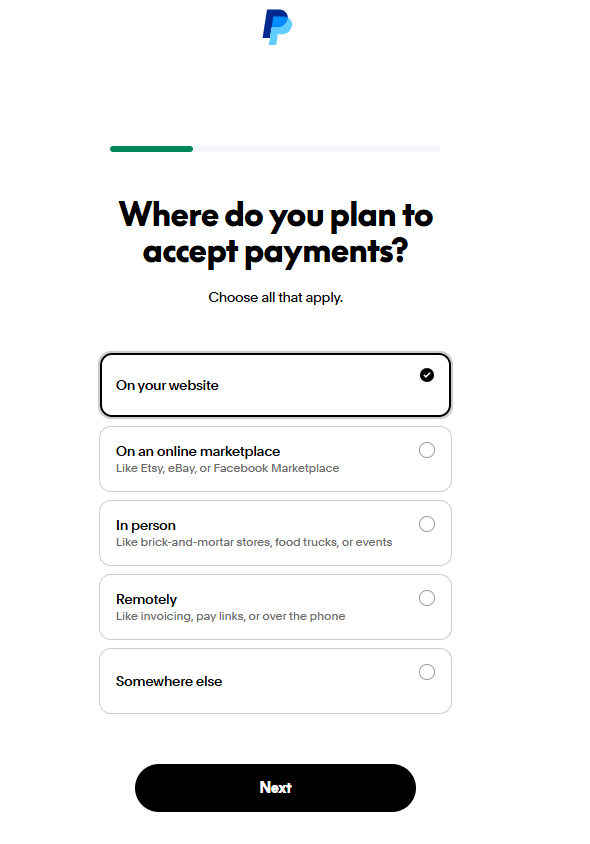
Step: Choose Where You’ll Accept Payments
PayPal will ask where you plan to receive payments.
- Select On your website
- Click Next
👉 This option is required to connect PayPal to your Magento store and accept payments directly on your website.
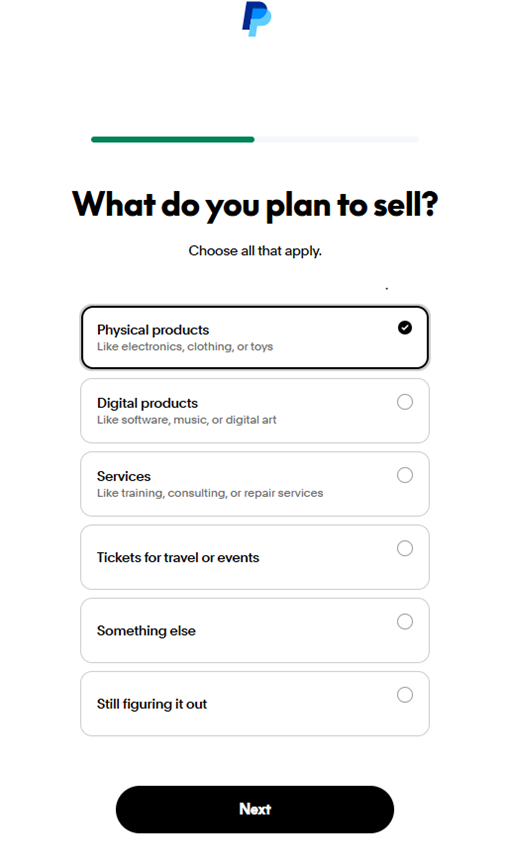
Step: Select What You Plan to Sell
PayPal will ask what type of products or services you’ll be offering.
- Select Physical products
- Click Next
👉 This is the correct option for your Magento store, as you’ll be selling physical items from your product warehouse.
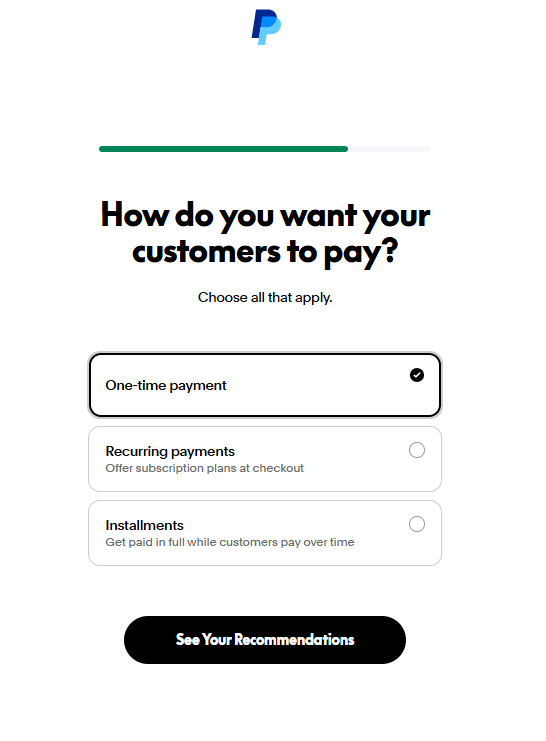
Step: Choose How Customers Will Pay
PayPal will ask how you want to receive payments from customers.
- Select One-time payment
- Click See Your Recommendations
👉 This is the correct option for standard online orders through your Magento store, where customers pay in full at checkout.
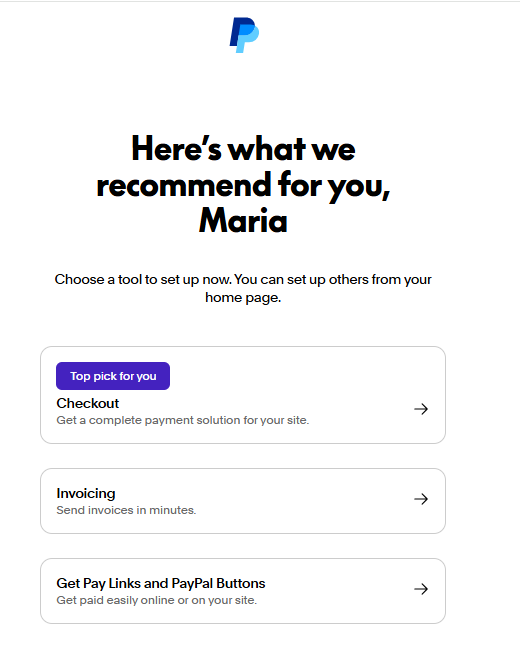
Step: Select Checkout Setup
PayPal will recommend tools based on your answers.
- Select Checkout (Top pick for you)
- Continue to the next step
👉 This option is required for your Magento website, as it enables full payment processing during checkout.
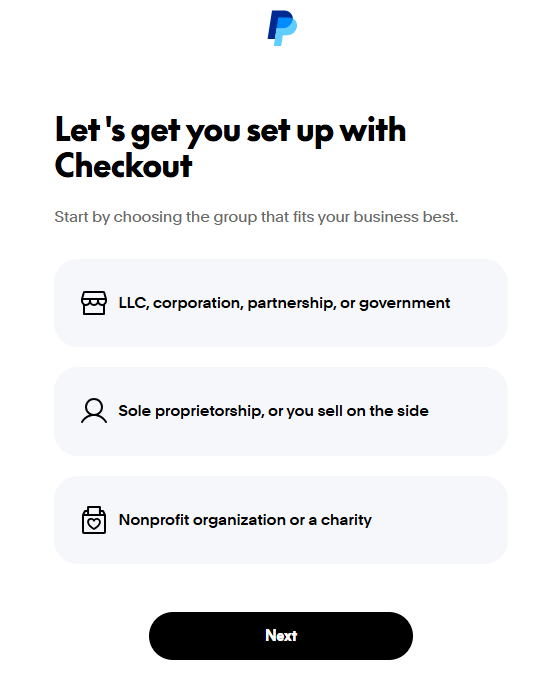
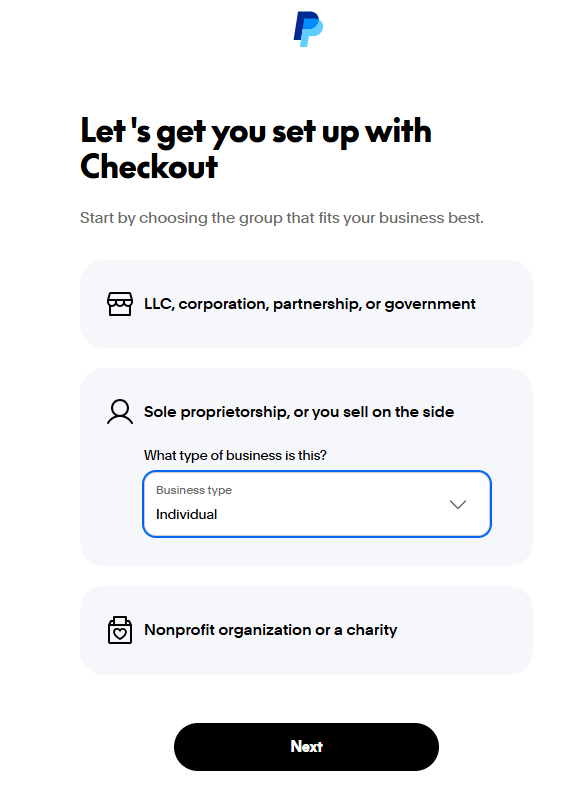
Step: Select Your Business Type
PayPal will ask how your business is structured.
- Select Sole proprietorship, or you sell on the side
- Click Next
👉 This is the most common option for new eCommerce store owners and is recommended unless you have a registered business entity (LLC or corporation).
Step: Confirm Business Type
After selecting your business structure, you’ll be asked to specify the type.
- Under Business type, select Individual
- Click Next
👉 This is the correct selection for most new store owners who are operating as individuals.
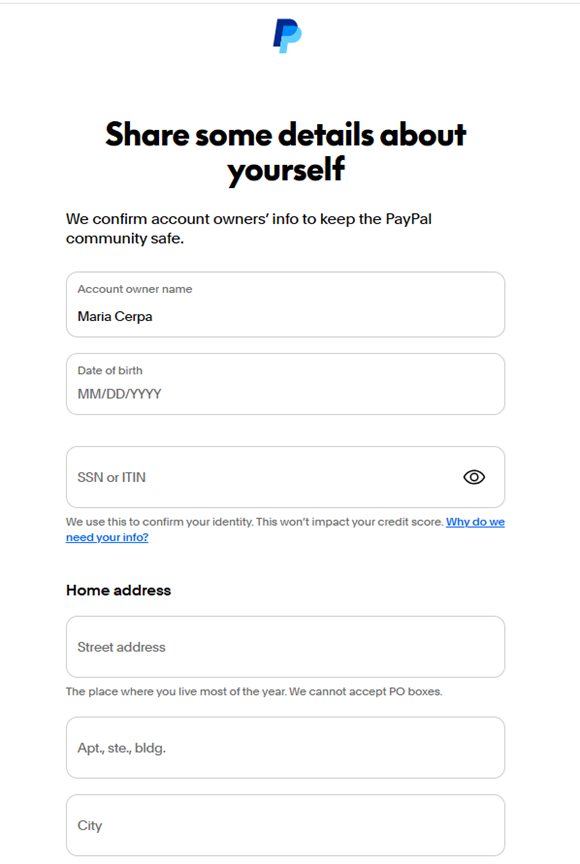
Step: Enter Your Personal Information
PayPal will require your personal details to verify your identity and secure your account.
- Enter your Full Name (as it appears on your ID)
- Enter your Date of Birth
- Enter your SSN
- Fill in your Home Address:
- Street address
- Apartment/Suite (if applicable)
- City, State, and ZIP code
- Phone (mobile)
- Click Agree and Submit
👉 This information is required for account verification and does not affect your credit score.
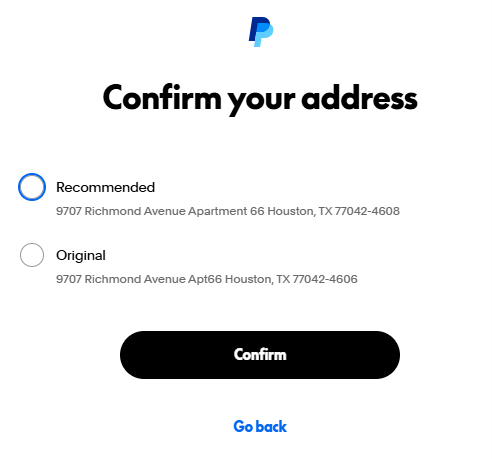
Step: Confirm Your Address
PayPal may suggest a standardized version of your address.
- Select the Recommended address (preferred)
- Click Confirm
👉 Using the recommended format helps avoid verification issues and ensures your account is properly validated.
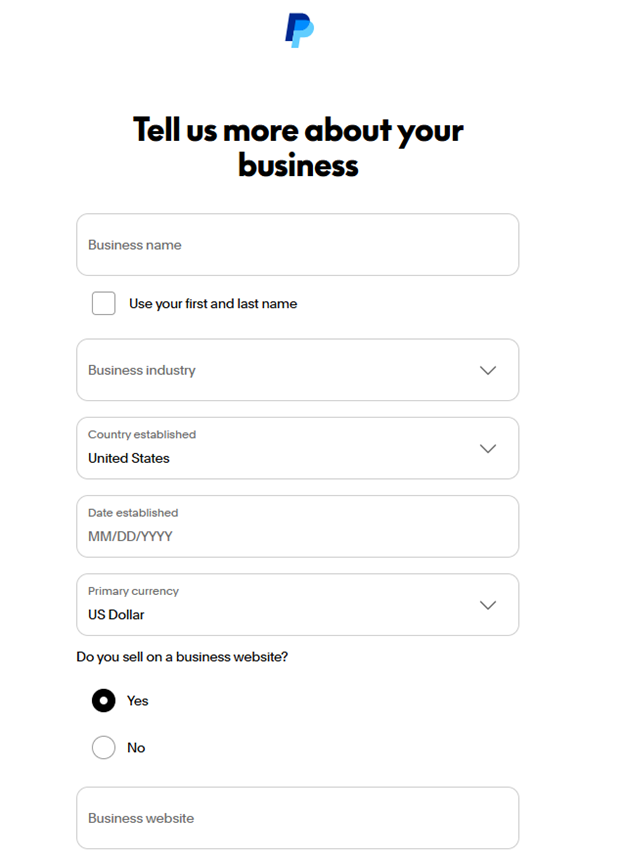
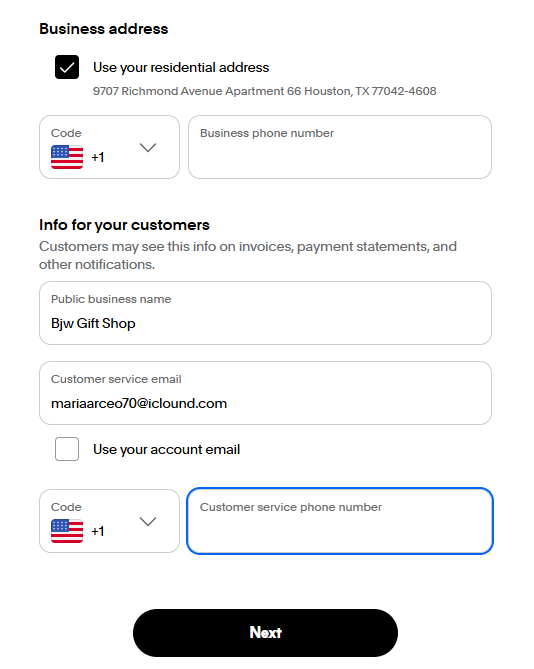
Step: Enter Your Business & Customer Information
PayPal will now ask for details about your business and how customers can contact you.
Business Details:
- Enter your Business Name (your store name)
- Select your Business Industry (choose the closest match)
- Confirm:
- Country = United States
- Currency = US Dollar
- Enter your Date Established (you can use today’s date if unsure)
- Select Yes for: “Do you sell on a business website?”
- Enter your Business Website URL
Business Contact Information:
7. Confirm your Business Address
- Enter your Business Phone Number
Customer-Facing Information:
9. Enter your Public Business Name (what customers will see)
10. Enter your Customer Service Email
11. Enter your Customer Service Phone Number
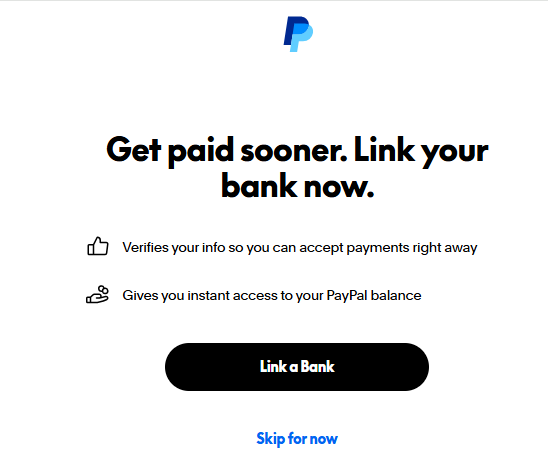
Step: Skip Bank Linking (For Now)
PayPal will prompt you to link your bank account.
- Click Skip for now
👉 You will complete this step later. For now, we want to focus on getting your PayPal connected to your website.
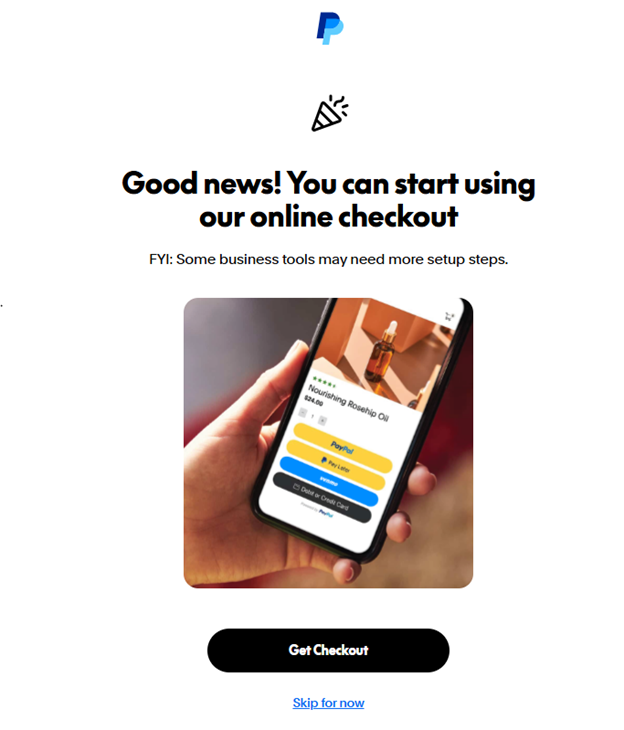
Step: Skip Checkout Setup Prompt
You may see a message about setting up PayPal Checkout.
- Click Skip for now
👉 We will not set this up here. Instead, we will connect PayPal directly through your Magento website in the next steps.
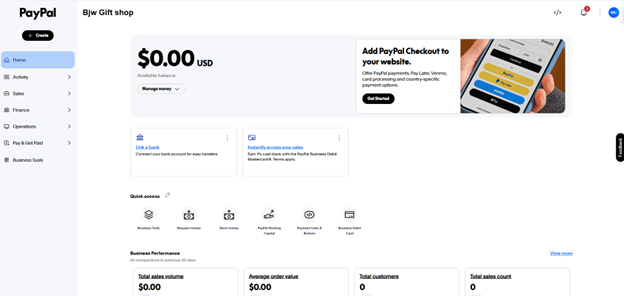
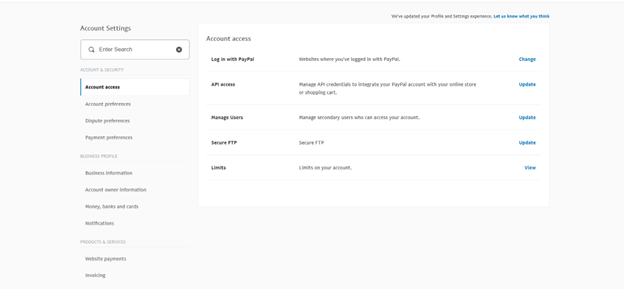
Step: Access Account Settings
You are now inside your PayPal account dashboard.
- Locate the icon in the top right corner
- Click on it to open your account settings
👉 This is where you will access the information needed to connect PayPal to your Magento website.
Step: Access API Settings
In your PayPal Account Settings:
- Make sure you are on Account access (left-hand menu)
- Locate API access
- Click Update on the right-hand side
👉 This is where you will generate the API credentials needed to connect PayPal to your Magento website.
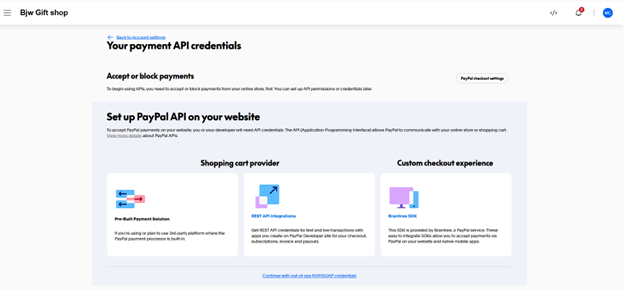
Step: Use NVP/SOAP API Credentials
You will now be taken to the PayPal API setup page.
- Scroll down to the bottom of the page
- Click “Continue with out-of-use NVP/SOAP credentials”
👉 This option is required for Magento integration, as it provides the correct API credentials needed to connect your PayPal account to your website.
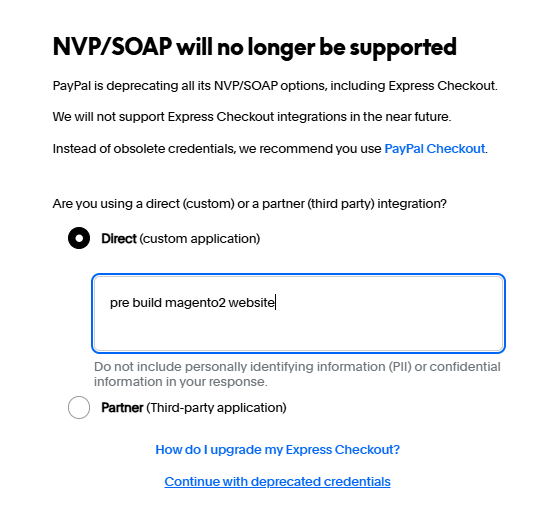
Step: Continue with Deprecated Credentials
You may see a notice about NVP/SOAP being deprecated.
- Select Direct (custom application)
- In the text box, enter something like: “Pre-Built Magento 2 website”
- Click Continue with deprecated credentials
👉 This step is necessary to generate the API credentials required for your Magento integration.
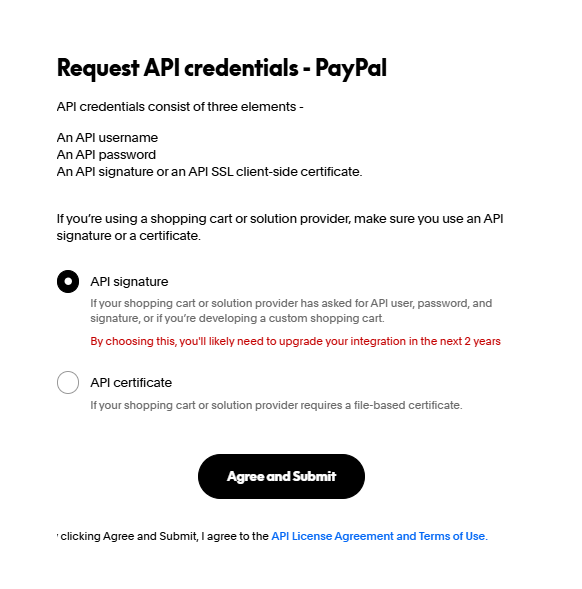
Step: Request API Credentials
PayPal will now ask how you want to generate your API credentials.
- Select API signature
- Click Agree and Submit
👉 This option is required for Magento, as it provides the API Username, Password, and Signature needed to connect your PayPal account.
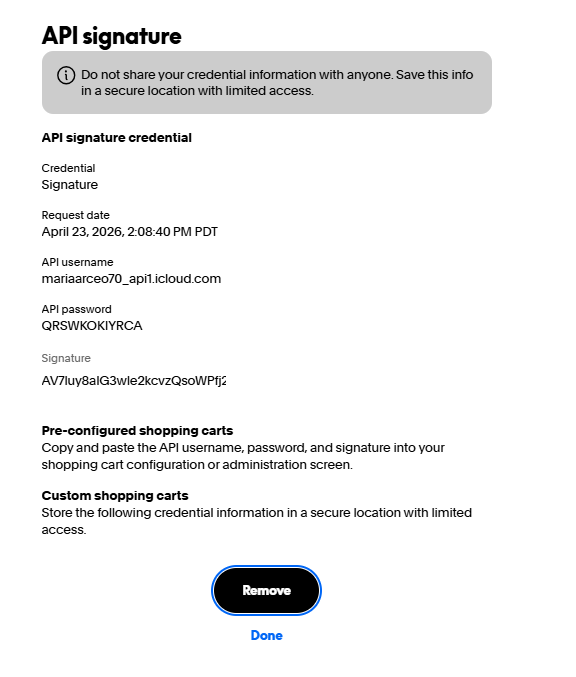
Step: Copy Your API Credentials
Your PayPal API credentials have now been generated.
You will need to copy and save the following:
- API Username
- API Password
- Signature
👉 These credentials are required to connect PayPal to your Magento 2 website.
⚠️ Important:
- Do not share these credentials publicly
- Keep them saved somewhere secure
- You will use these in the next step when connecting PayPal inside your Magento admin
Now it’s time to connect this API Signature info to your website – Login to your site manager > click on Stores > Configuration

Scroll down and expand Sales dropdown > click Payment Methods

Find the PayPal option and click Configure

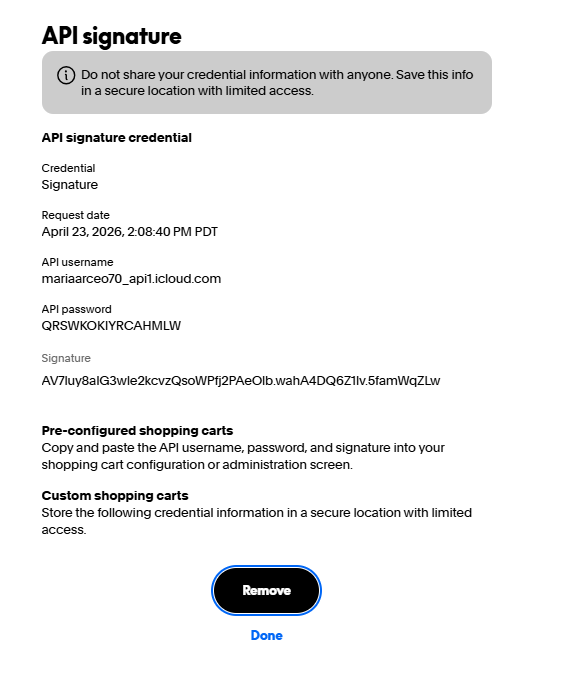
Copy and paste all of your credentials from the PayPal API Signature page (see what it looks like below as a refresher)
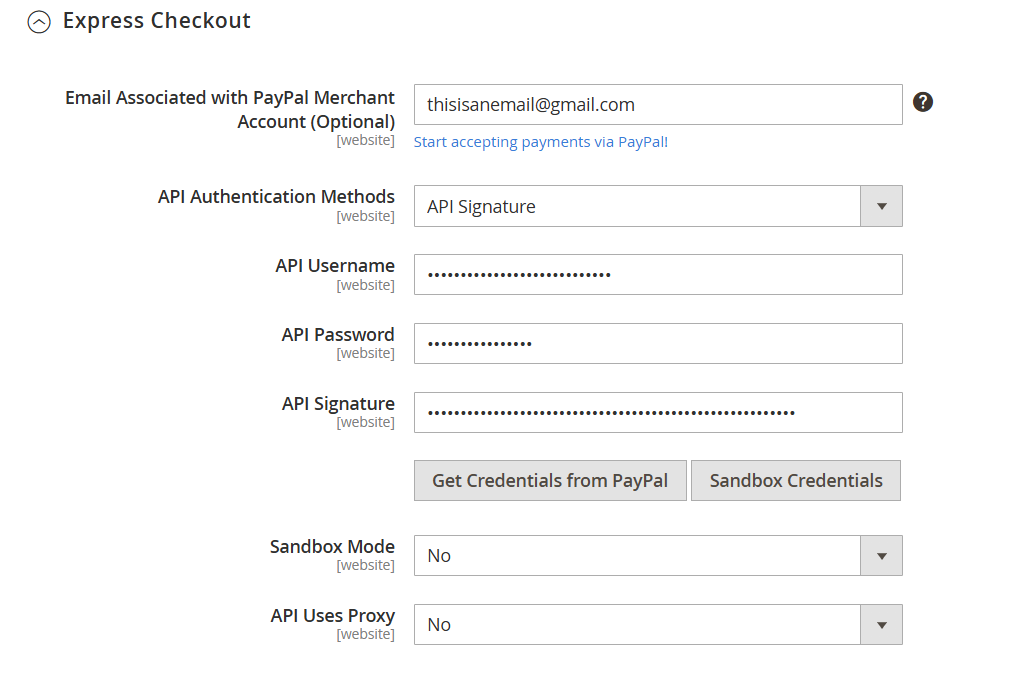
Click Save Config button in top right corner to save PayPal configuration changes

Last, go to System > Cache Management > click Clear Magento Cache

Your PayPal Business account is now set up and connect to your website. Visit the front end of your website > reload > and go to any product. You will now see options to pay with PayPal – Happy selling!
How did we do?
How to login to your website
Amazon Pay Set Up